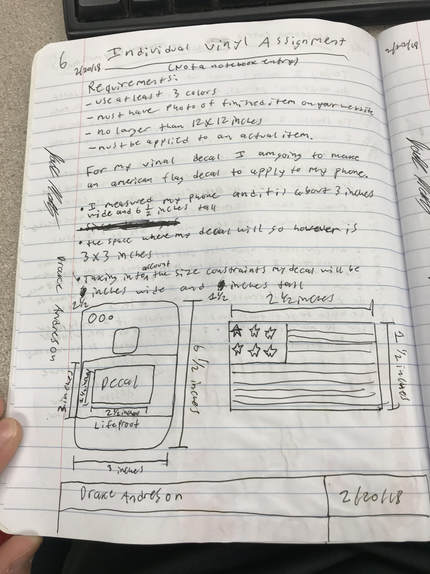
Requirements
For the individual Vinyl assignment there was certain criteria that I had to follow
- Must use at least three colors in the design
- Must have a photo of finished item on website
- Must be applied to an actual item
- Can be no larger than 12X12 inches in size
Generating Ideas (Day 1 of Rotations)
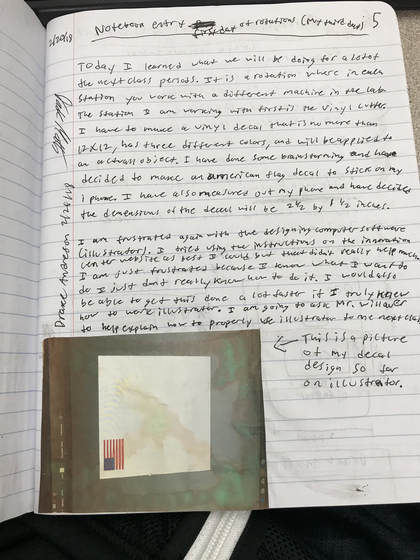
After brainstorming, I have decided to make an american flag decal for my phone. I then measured my phone and found out that it is about 3 inches wide and 6 and 1/2 inches tall. However the space that I actually want to place my vinyl on the back of my phone is only 3 inches wide and 3 inches tall. Taking into account the size constraints I have decided that my decal will be 2 and 1/2 inches wide and 1 and 1/2 inches tall.
|
|
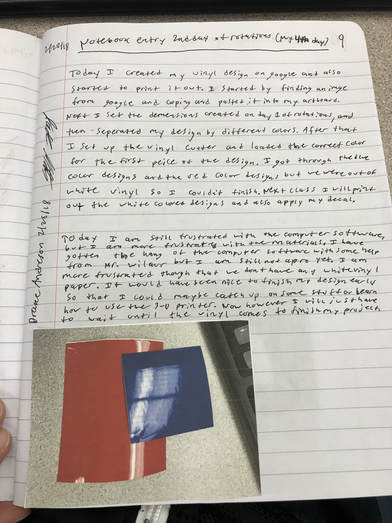
Creating and Printing Design (Day 2 of Rotations)
After looking on google I found an american flag image that I want to use for my vinyl design, so I copied and pasted it onto my art board. Next I selected the image and set it to the dimensions that I decided on in the previous step. After that was done I selected the image, selected image trace, and then selected three colors because my design uses three different colors. Next I grouped the different colors and parts into different groups by holding down the shift key. After that I made the white stars and stripes green so I could see them on the art board, and then moved each group to a different art board. After my design was all set I started to set up the Vinyl cutter. First I grabbed the correct color Vinyl for the corresponding group I was printing first and placed it on the roller. After that I slid the Vinyl under the wheels, lined up the Vinyl with the white marks on the side, and clamped down the wheels. Next I pressed F1 and then enter on the Vinyl Machine and let it measure the Vinyl. After that I selected the correct art board, made sure I didn't have a big box around my design and if I did I pressed on the border of the art board and hit delete. After this step I was finally able to print my design. I got to print the red stripes and the blue surrounding the stars today in class. However we are out of white Vinyl so I wasn't able to print out the white stars or stripes.

|
|

|
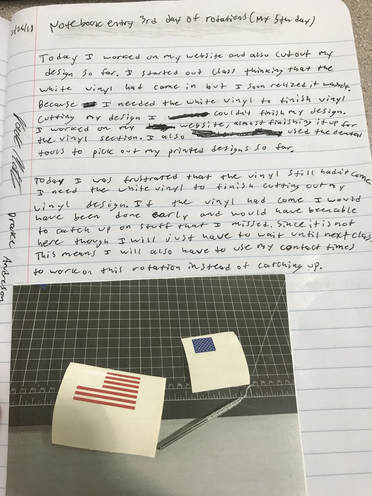
Cutting Out my Vinyl Design and Working on my Website (Day 3 of Rotations)
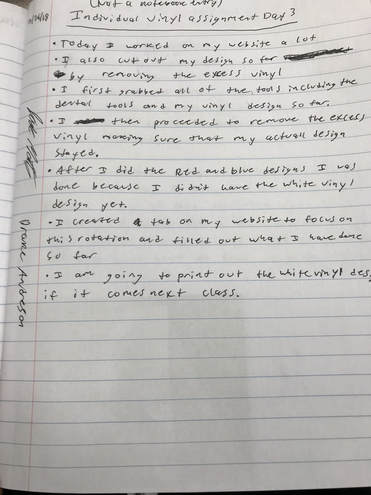
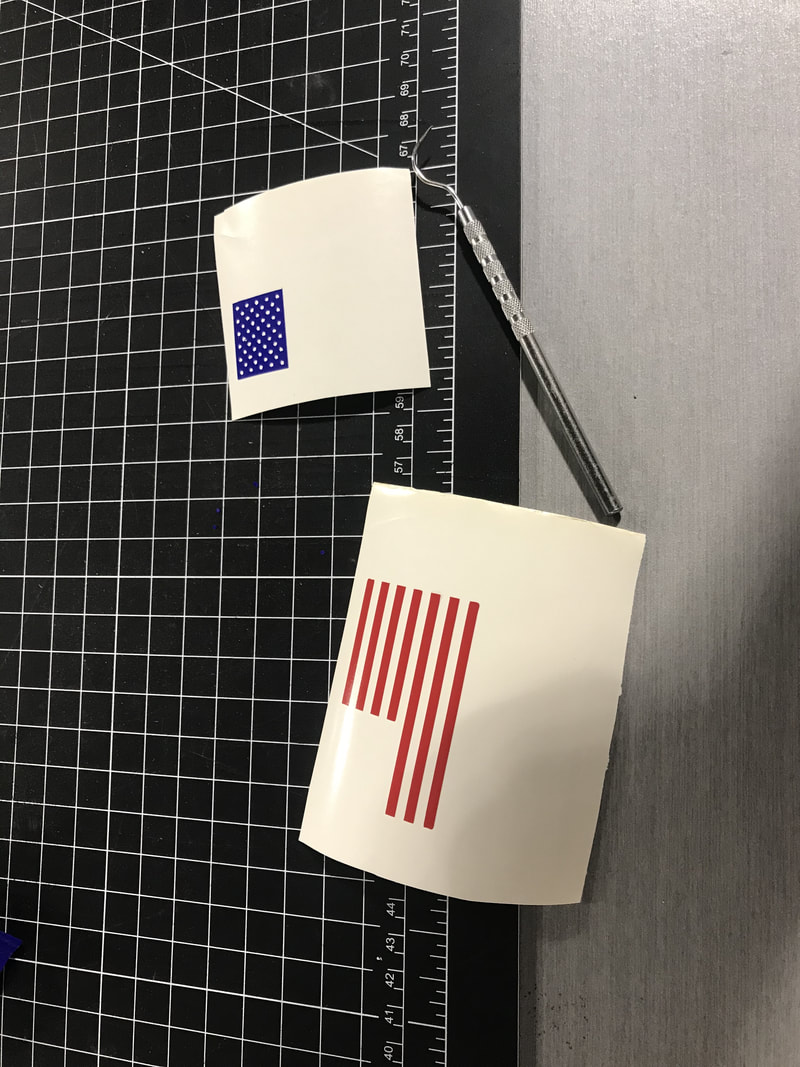
The white Vinyl that I had been waiting for still hadn't arrived yet so I decided to just continue on without it. I first used the vinyl tools to remove the excess vinyl on the red and blue designs. After that I was pretty much stopped in my tracks because I needed the white vinyl to complete my design and be able to put it on my object. Because of this set back I mainly worked on this website for a majority of the class.
|
|
|
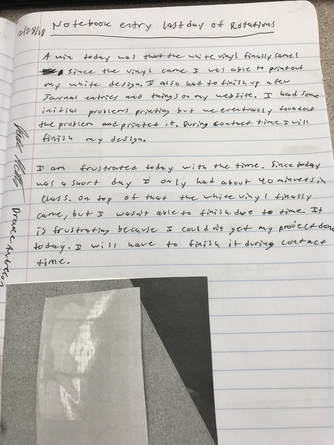
Last Day of Rotations and Finishing up my Vinyl Design (Day 4 of Rotations)
A big win for me today was that the White Vinyl finally came! Now I could finish printing my decal and my project. However, because of the late start today we only had 45 minuets of class and I was a little crunched for time. I initially had some problems printing out my white Vinyl design because a big rectangle kept showing up when I tried to print which would waste a ton of Vinyl. I eventually found out the solution which was moving the stars and stripes closer together. This got rid of the big rectangle and I was finally able to print. This problem however took some time to solve and took away working time from an already short day. As a result I was not able to completely finish my decal so I will have to complete it in contact time.
|
|
Finishing my Project During Monday Contact Time
Today I was finally able to finish my Vinyl decal in contact time! I started off by removing the excess Vinyl from my white design that I printed on Thursday. After all the excess Vinyl was off I then put masking tape over each part of the decal. I then took the white squeegee and rubbed the tape down making sure it stuck to the Vinyl. Next I peeled off the tape making sure that the Vinyl also came off with the tape. Once I had all of the parts of the design on the masking tape I was ready to apply it to my object, my phone. I measured out where I wanted to place my decal on my actual phone using the dimensions from day 1 of rotations as a guideline. After that was completed I started first with the white stripes. After those were on and pressed down I used them as a guideline to place the red stripes down. Next I placed the blue outline for the stars in the top left corner. When it was time for the white stars however I couldn't get them all to stick down or get into the correct positions since they were so small. I decided just to leave out the white stars and that my decal looked better without them any way. After this my project was complete.
|
|
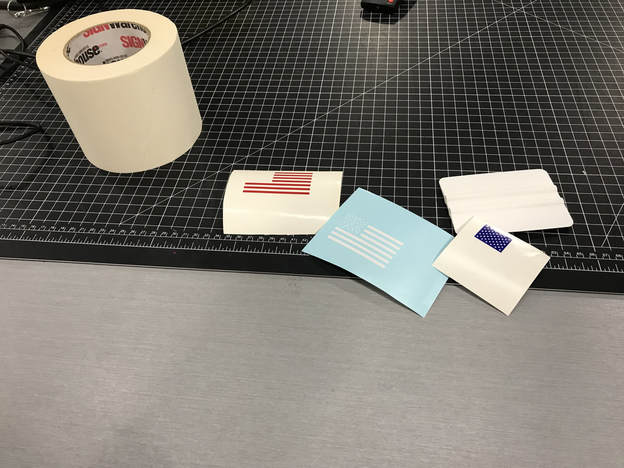
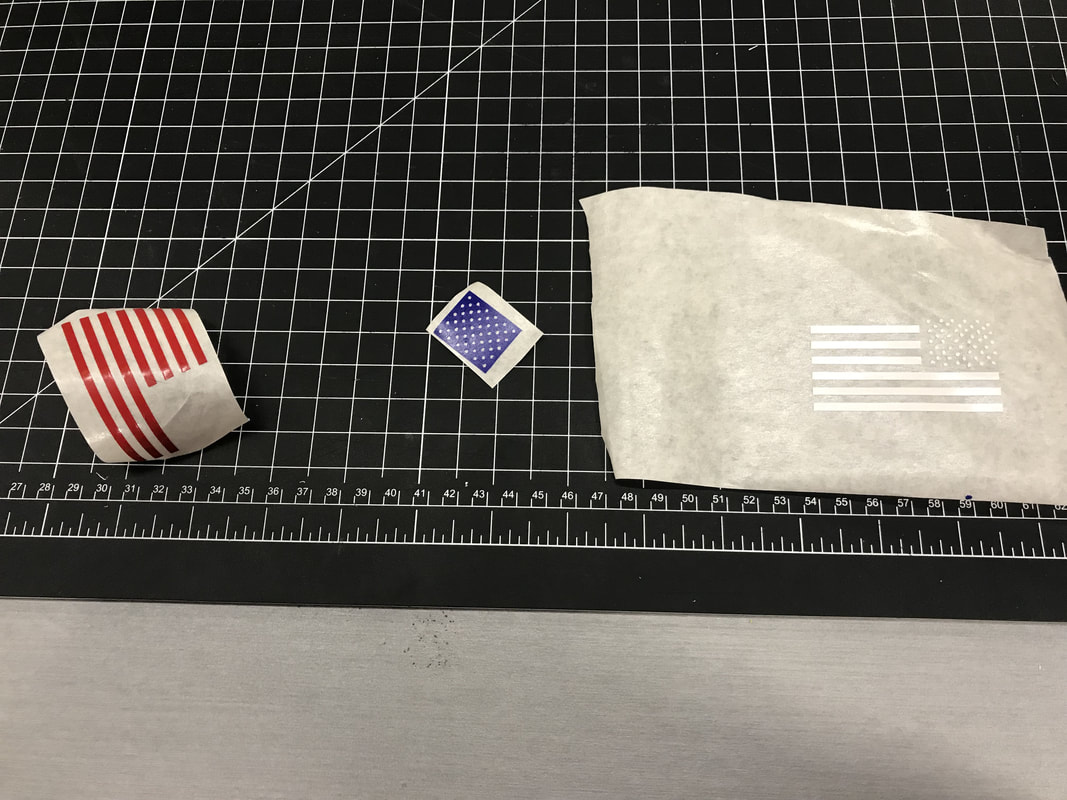
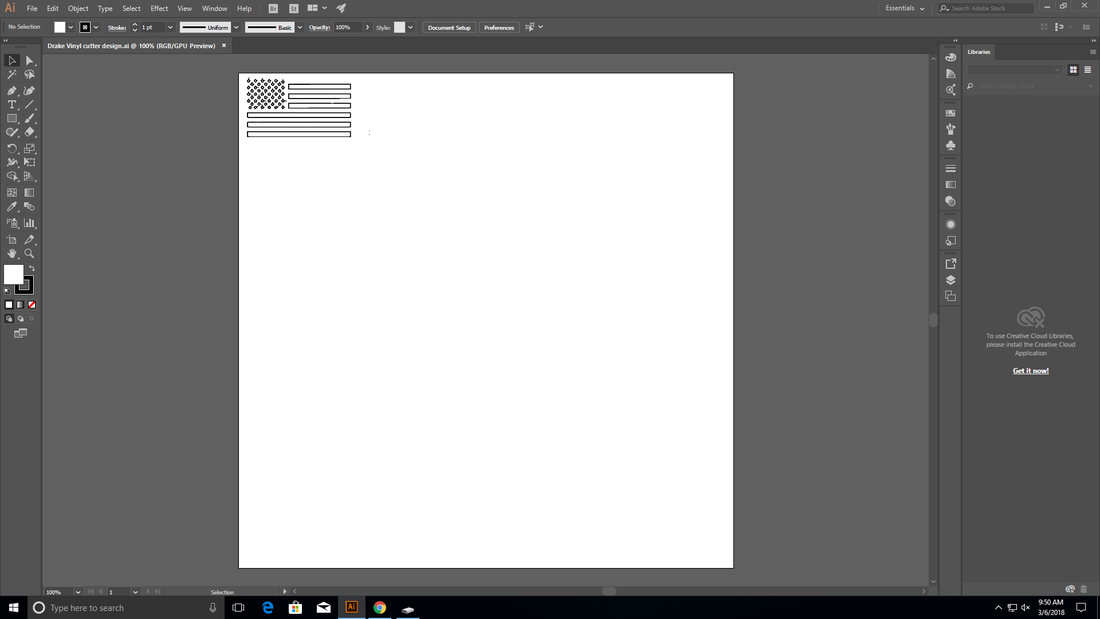
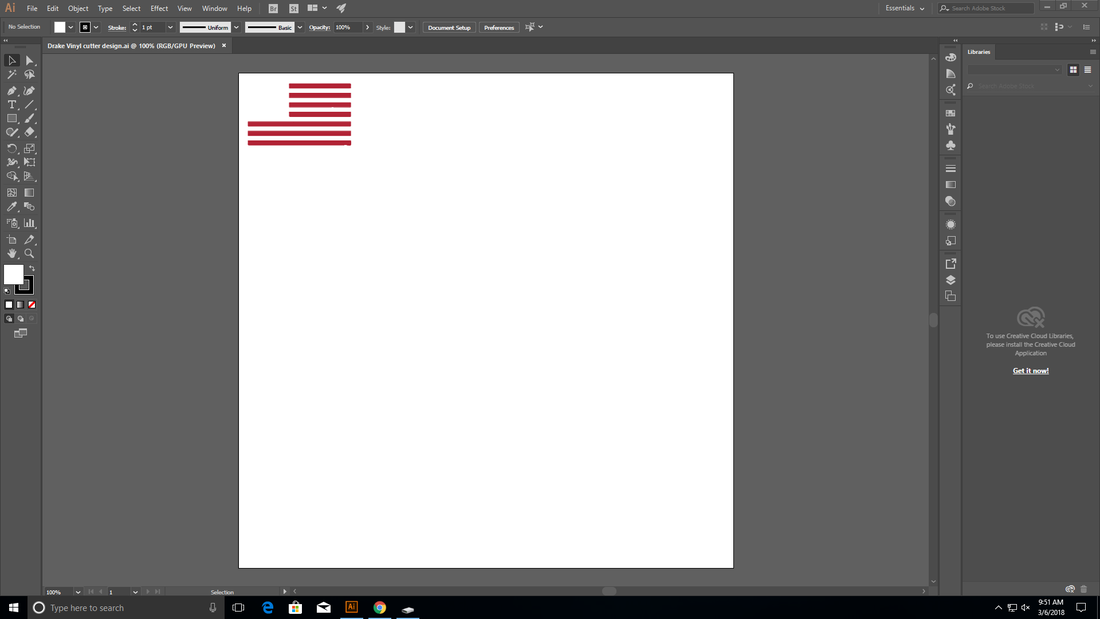
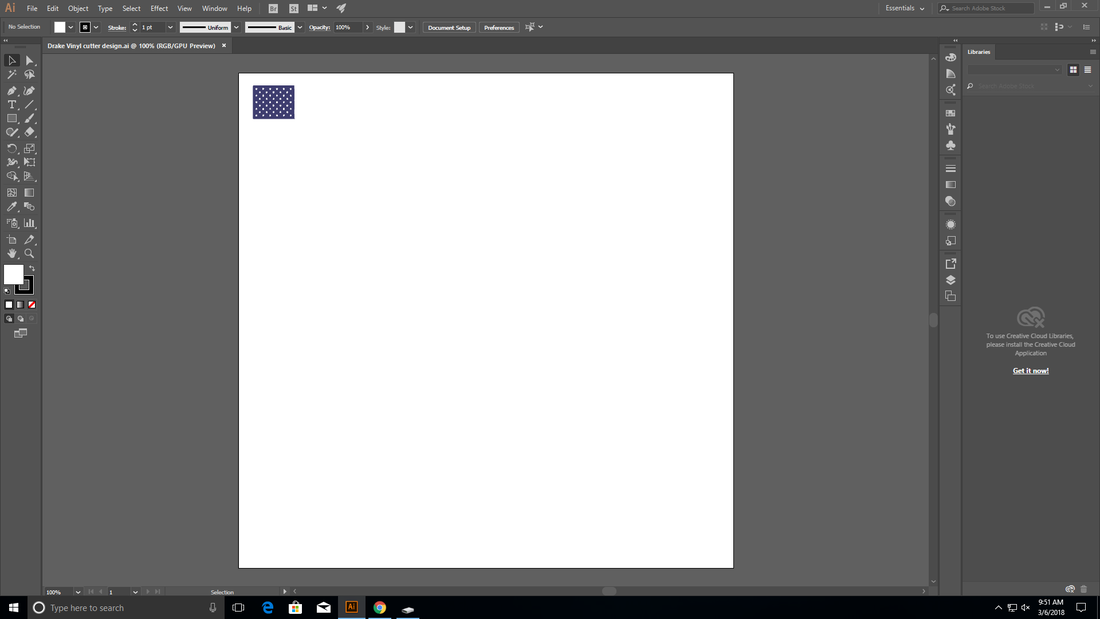
Here are my digital documents used in my vinyl assignment
I made three different art boards because my design has three different colors that I had to print out separately. The first one is the white stars and stripes. The second one is the Red stripes, and the third one is the blue outline for the stars.
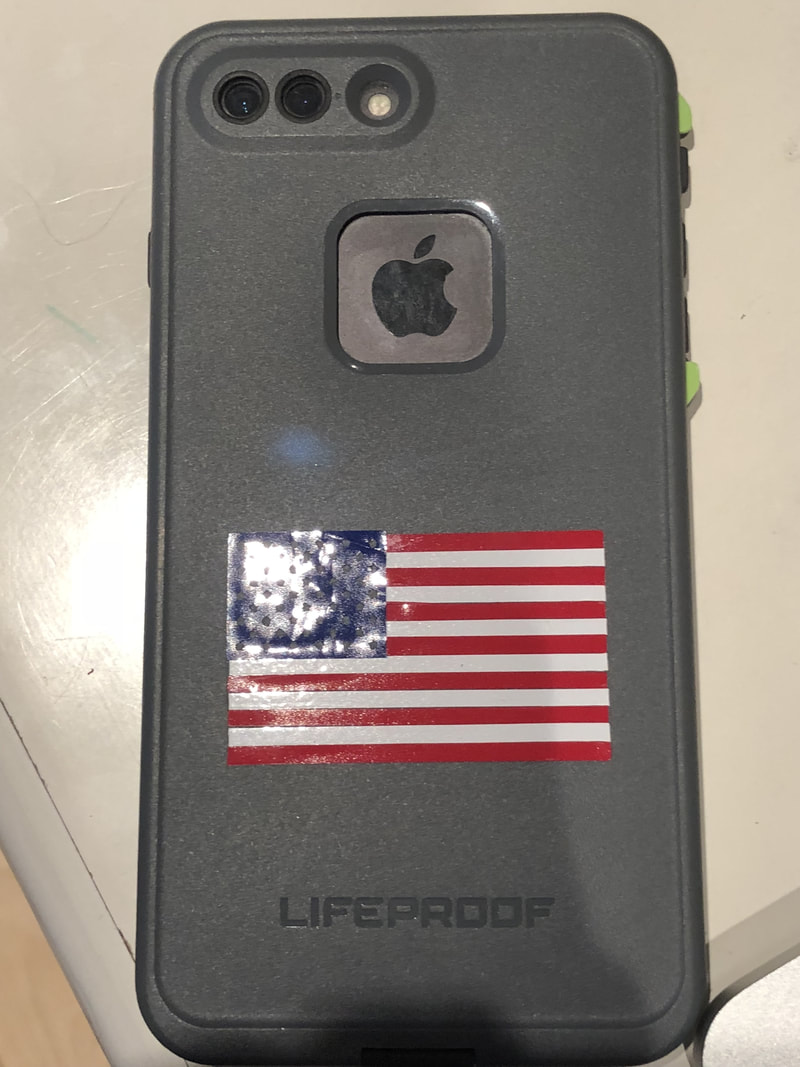
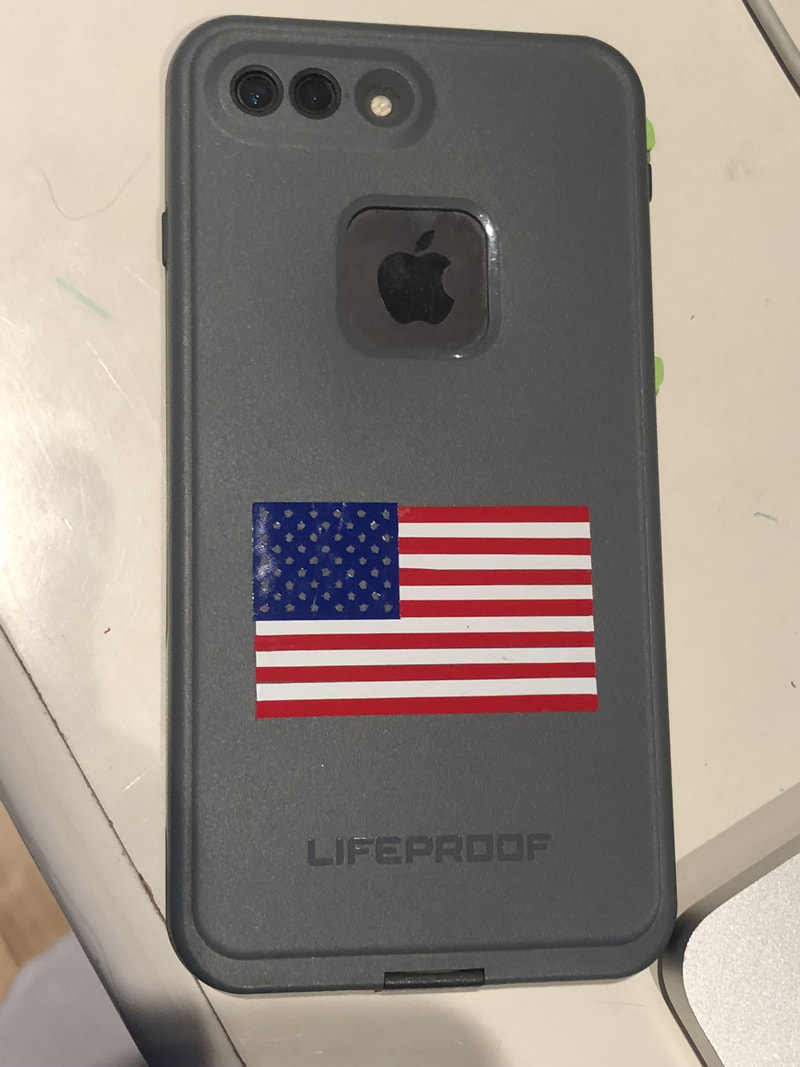
Final Product
After all of the designing of my Vinyl decal, and creating it on the illustartor softaware, and even after physicaly printing and applying the decal, I have finally gotten my final product. The demensions are all the same as I had decided on and everything went as planned except that I had to leave out the white stars. Other than a few minor setbacks I was able to complete this project within the time frame given, and have created a successfull product. Here is what my finished product looks like:
What I Have Learned
This project not only showed me how to create a vinyl decal from scratch but it also taught me some valuable life lessons. After doing this project I have a way better understanding of the computer software Illustrator. I also now could use the Vinyl cutter and apply my Vinyl decal without any help. During this assignment I also learned how to manage my time wisely because we had a specific time frame to complete the project in. I also learned to overcome problems, because when the white vinyl still hadn't come I still had to continue on with my project and finish it while not worrying about what could happen if the vinyl didn't come in time. Another skill that I picked up was documenting all of my steps. Before this assignment I would probably not have documented my steps unless I had to. But after doing this project and documenting along the way I will probably document everything from now on without someone having to tell me to. And finally, I learned how to improvise and innovate. When I figured out that the white stars were not going to work I had to improvise and innovate the project without them instead of trying to get them on and either wasting valuable time, or recking my decal. All in all this project did a lot for me then just learning about the Vinyl cutter, it also taught me valuable life lessons.
